Team 12 Game Development Artifact 6- Highscore

Team 12 is working on a game called DashBat. The game is going to be a mix between speed runners adm super mario kart, the player is in a flying state. To progress through the level the player needs to avoid multiple objects at a high speed and to reach the end of the level in a short time.

Just after we finished with beta i started working on a High score system where you compete against others and try to get the lowest time possible to beat the level.

What is it ?
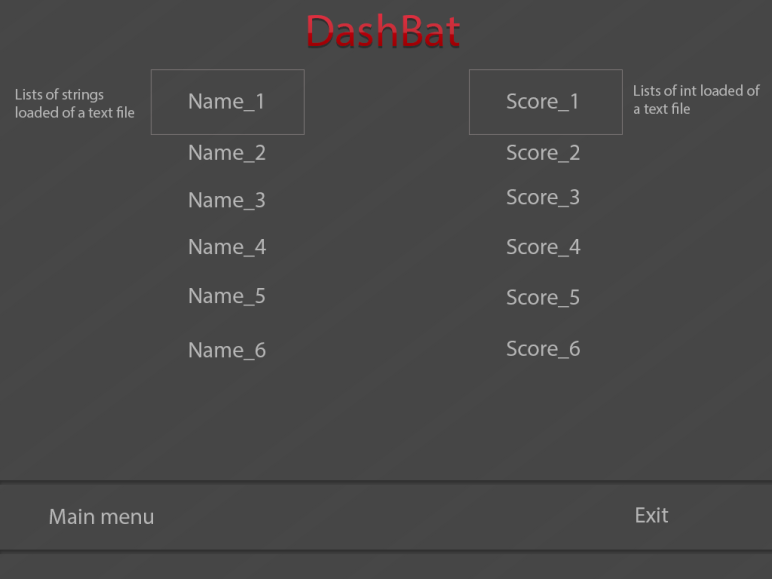
First, I would like to start off with describing what the artifact is. The highscore system is pretty basic at the moment, it contains the player’s name alongside with his/her score. These information are written on one line. The goal is to display the ten lowest time ever achieved. This might change in the future, where displaying all the scores might be required at some point. Finally I added an number to the left of each line to indicate the order.

How was it done ?
Even though this artifact is not 100%done as i write about, it reached to a point where it’s found introns are in no need to work with anymore unless a problem occurs,tweaking it is now is main focus. What I did was simple, I basically start using the scores as the player finishes the game, a text box appears to enter the name of the player. After that I save both the name and the score into a text file. When it comes to displaying the data, I extract from the same file the needed information.

Why?
Since our game was a race against time kind of game, it felt right to include such a feature. On to why I implemented it the way I did, there is no clear reason to it. When I worked on this artifact, I had no prior experience to making a basic highscore system, so everything I dead was merely a test or way to practice depends on the way you want to see it. Saying that, I have one thing that i want to mention about some of the few reasons behind making the highscore system. I used something called std::pairs when it come to sorting out the scores according to it’s owner. Std::pairt help create a connection between a name and a number making sorting out the score from lowest to highest quite easy.

Not much to add other than final touches and more polishing until the final state of the game, where everyone in the class is going to try out our game alongside with other games.

Team 12 Game Development Artifact 5- Drawing guides

Team 12 is working on a game called DashBat. The game is going to be a mix between speed runners adm super mario kart, the player is in a flying state. To progress through the level the player needs to avoid multiple objects at a high speed and to reach the end of the level in a short time.


This week’s artifact is going to be a little bit different. It’s going to be diffrent in both fucntalolity and pourpse.


What ?
It’s a system that helps debug bugs, that I often encountered when working when working on collisions. My friend Anders Jonsson, presented that idea to me in the early stages of development, so I started to work on it right away. The system development as we started to include new type of colions, so it consisted of shapes like rectangles and lines that represented collisions.


How ?
Every entity in the game contains either a rectangle collider, line collider or both. To draw these shapes, I made a function inside the collider to return the shape of the entity. This meant that it drew at the position of the entity and it kept updating as the game started to progress. Since a got alot of requests to show my code. I’ll sow it in both c++ and pseudo code for anyone that is unfamiliar with the language.


Pseudo:

 return value is type rectangle, function's name = GetRect()
{
return the rectangle shape with it’s components(x, y, width, height).
}


C++:
 sf::RectangleShape &Collider::GetRect()
{
return m_area;
}

I use this function to draw the rectangle, as mentioned above. it contains all of the entity’s properties.


Why ?
The answer is quite easy, I used this method of debugging simply to save time and energy as well as to get precise result when it came to creating the response to the proper colliders. Our game required near perfect collision to behave well. With the help of this method, it was easy for us to visualize the collision boxes or lines to detect if they are functional. I could go on and on on the benefit but I think that I can safely presume that you understood the reason behind it and for that I would recommend using this method when it come to handling complex collisions.


Tomorrow will be the day we and the other teams will present our game in the beta state, I hope that every things well and I was the best of luck to everyone involved and to enjoy the show!

Team 12 Game Development Artifact 4- Menu state

Team 12 is working on a game called DashBat. The game is going to be a mix between speed runners adm super mario kart, the player is in a flying state. To progress through the level the player needs to avoid multiple objects at a high speed and to reach the end of the level in a short time.


Today I will try to explain one of the artifacts that I have worked on during the past two weeks. and that is Menu State.

Most games need a menu state, to navigate between the available mode or controls for the game. But the artifact that i have worked on is a lot simpler than most menus so lets start analyzing what it is, how was it built and for what reason.


What…

The menu state is consisted of  four components each differ in purpose. The first component is a background, the background is static sprite. In the future, it’s going to be an animated one. The second and the third component are the menu buttons, one to start the game and the other to quit. The last component is rather invisible, it’s a small rectangle shape that follows the mouse, the rectangle shape is used to detect if the it inside a specific area to execute an operation.


How…

Switching between states was done by checking if the rectangle shape is inside the start button’s sprite, when the condition is true, the current update function for the current state will return false, forcing the game to switch to the desired state. Since we use an engine, trying to communicate the mouse event through the other states was hard at the start, not only that the mouse positions was out of sync from the. This was easily fixed by getting the mouse position that is relative to the window that why, it return the exact values.


Why…

Other than the reason of to navigate easily through the game, I thought that creating a simple GUI was a good practice. Creating  a well designed GUI is hard and it can get a lot harder when new elements are introduced, luckily the game did not need a very complicated GUI. So for that reason, I took that chance to practice a bit.


Beta is next week, so my team and I will focus more on polishing the game, so stay tuned for more !


Marwan

Team 12 Game Development Artifact 3 – Collision blocks

On our way to beta! Team 12 is working on a game called DashBat. The game is going to be a mix between speed runners adm super mario kart, the player is in a flying state. To progress through the level the player needs to avoid multiple objects at a high speed and to reach the end of the level in a short time.

I’m gonna talk about on of the artifacts that I worked on, collision blocks. This artifact is a bit different, so far I have only talked about artifacts that i have created, but this one was most implemented from another game engine and was converted or rewritten to match our game better.

So what is it ?

The collision blocks are consisted of three boxes or colliders, each one of them has a different size and position. Both the scale and the position is related to the original entity. They are basically a resized version of the entity’s bounding box. They were designed in a way to only be used if the right conditions are met. That means we can use collider one and three without working about the second collider, avoiding unwanted calculations.

The functionality

I’m not going to go into detail on how the collision worked, because it was not the purpose of this artefact. But i’m gonna explain how I  broke the original collider into three parts. Having a pre-existing collider meant that I needed two more collider to make this method work. I started by creating the needed colliders for each entity in the game. Each collider had to be resized and positioned differently to improve the collision in the game. Here is picture of the thought behind the collision blocks.

blog_3

Why?

The original collider made the the whole process “ugly” for a lack of a better word. It was really hard to tell when a game object is going to collide with other objects, making the main mechanic of the game (flying) boring and plainly unresponsive. We could have used perfect-pixel collision, but after some research, we found out that it a bit taxing and could slow the game down and breaking the already working collider was the far easier method at the time, plus having experience with that particular collision system helped alot.

Thank you for reading! Stay tuned for more artifacts for the next three weeks.

Marwan

Team 12 Game Development Artifact 2 – Background looping

Alpha is upon us! In two day Team 12 will present Heartbeat bat in it’s alpha state. The game is going to be a mix between speed runners adm super mario kart, the player is in a flying state. To progress through the level the player needs to avoid multiple objects at a high speed and to reach the end of the level in a short time.

During this week I worked on creating a looping background for our game Heartbeat Bat, I will go into detail on the What, the how and the why.

What is it ?

The looping background artifact is consisted of two identical backgrounds, left background and right background. The left background is the starting background and the right background is placed right next to it ready to be displayed when the game camera moves. When the player reaches the backgound middle point, the game switches the previous background and place it in ahead of the player behind the gameview. Each background is big enough to cover 10 screens of width 1080p and they were drawn in a way that they will always blend with each other, leaving no possibility for any distortion.

How ?

I used a very simple method of switching between the backgrounds when they are needed. The trick was to use a an infinite loop that switches the x positions of the backgrounds. moving them in and out the viewport(camera) of the game with the help of a trigger. The trigger executes when the player x position is bigger or equal to the current background x position + half the width of the background. When that condition is true, the previous background will be placed ahead of the current background behind the scen(camera).

blog_2

Why ?

At the start of the project we drew multiple backgrounds at the same time at different positions, which was problematic, for many reasons. The backgrounds are 10000 pixels wide and are about 4 megabyte each, placing several of these backgrounds slowed the game down. The other reason was when the player flew by the end of the backgrounds, the backgrounds was still been drawn outside the camera which was a waste of resources. We chose to switch the backgrounds infinitely because we did not have a fixed length for each level, so this method could be reused again for the other levels with different lengths. Top stop the infinite loop we use a timer to stop the game.

Team 12 Game Development Artifact 1 – Level Structure

It has been three weeks since group 12 started working on developing a 2D side scroller with the name Heartbeat bat, this title is still on the work due to not using some of the original features. The game is going to be a mix between speed runners adm super mario kart, the player is in a flying state. To progress through the level the player needs to avoid multiple objects at a high speed and to reach the end of the level in a short time. Adding multiplayer is a secondary goal that will only be worked on if enough time is available. At the moment we have a working engine and a very respectable collection of art assets. My work consisted of building the foundation of our game, like structuring our engine to our needs and creating an easy to edit level system.

Today I’m going further into details about one of the artifacts that I worked on during the past three weeks and that is Level structure. I will explain what is it and why was it used.

What is it ?

It’s a text based system that contain numbers from 0 to 9. The zero represents an empty space, while the other numbers represent a different sprite of an entity. Alongside with the numbers, special symbols are placed at the end of each line, their use is to differentiate between entities, for example ‘#’ would represent an ice shard while ‘$’ represents a stalactite.

How was it done ?

In the image below, you can see the information that is being extracted from the text file, any line of numbers that ends with the symbol ‘#’ will represent an ice shard. All the information that has been extracted will be added to a dynamically sized container called a vector. This vector will be used multiple times to build the level as desired, this is done by going through every element in the vector extracting the numbers and the symbols inside.

blog_1

What was the purpose behind it ?

Since our game is consisted of a lot of objects, I wanted to create an easy way to design the level without rewriting/editing big chunks of code. Changing the level structure now can be easily done by tweaking the numbers inside the text file, this applies for the position of the entity, the sprite and the type of the entity.